Wednesday, 22 February 2023

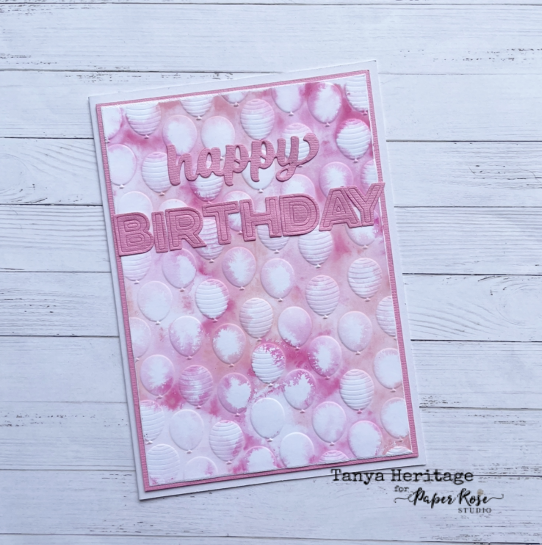
Balloon Embossed cards

Hello there

Here are a few cards that I have made using the same 
technique, just different colours.


Put white cardstock into embossing folder and emboss. 
Then rub distress oxide colour onto the embossing folder on the 
side that has the indents. Place the embossed card back into the 
embossing folder and run back through the embossing machine. 
Take out of folder and lightly spray with water to let the colour mix.
Die cut out happy birthday sentiments with matching coloured cardstock.

Here are the Paper Rose products that I have used to make these cards.


Sunday, 12 February 2023

Fun Vibes Layout


Hi there
Sharing another project for Paper Rose Studio.
I was going to make a Valentines Day card as February is love 
month but I thought I'd scrapbook a layout of the first of 
my two little loves (who is turning 25 this year!!)


To create this layout I have cut my white cardstock to be slightly 
smaller than the black cardstock. 
I distressed the edges and handstitched around the edge. You could 
machine stitch around the edge if your prefer but I love hand 
stitching, call me crazy but I find it therapeutic.

Then stencil onto the white cardstock using light moulding paste 
and the scattered hearts stencil. Once dry spray some black ink 
over the two corners.
Cut your papers into different sized strips and sand the edges. 
Die cut out the envelope and add the seal using pink paper.

Mount photos onto black cardstock and put layout together. I have 
added a few flowers that I had in my stash. Cut out some sentiment 
words from this paper collection to add to your layout.


The Paper Rose Products that I have used on this layout are:
28435 Fun Vibes 12x12 Paper Collection
26377 Envelope 2 die
20991 Scattered Hearts Stencil


Thanks for stopping by - Tanya x
 

Friday, 3 February 2023

Roar - It's your birthday


Hello there

Sharing another shaker card with you just because 
I love making them. 

Here is how I have made this card:
Stamp your images using different coloured stamp pads. 
Die cut out sentiment using tag die.
Die cut out 5x Spots & Dots Slimline Coverplate. Attach one
 to acetate and them attach the other four diecut pieces to 
the underside of the acetate. Add the shaker mix and cover using a 
piece of white cardstock. Attach to black cardstock and add to 
card front


Sunday, 22 January 2023

Ink sprays and stencils


Hello there..
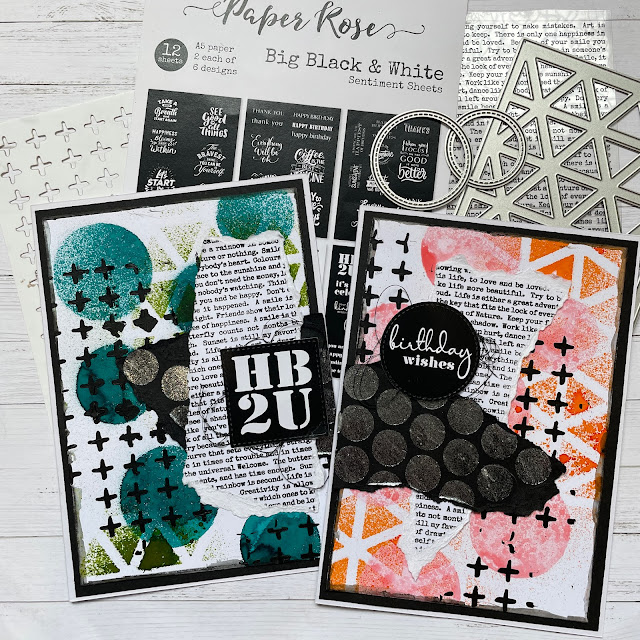
Today I'm sharing a couple of cards I made for Paper Rose. 
I'm not good at messy but really felt like having a play with 
ink sprays through my stencils. 


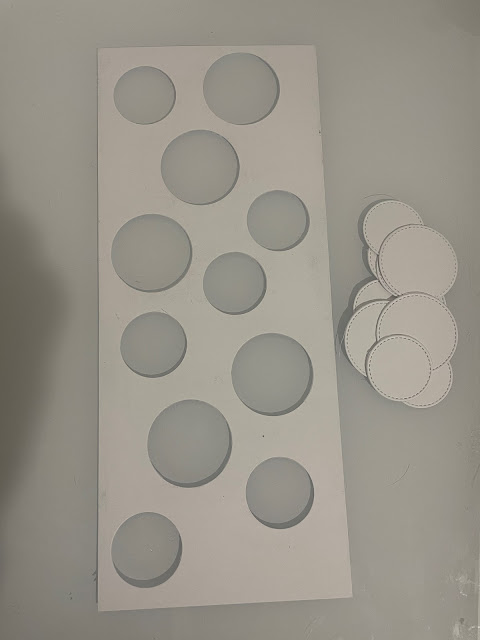
 I wanted to add large circles to my cardstock. The circles on my stencils were too small so I diecut out circles onto white cardstock using 16548 Stitched Circles Dies 


I then sprayed through the circles with spray inks.
Allow to dry in-between colours as it is only cardstock 
and can't really be wiped clean.


Next I diecut out using the 22489 Slimline Card Creator 
Layer 1 Triangles Die and sprayed inks through onto my 
dried white cardstock. 


Stencil onto black cardstock using the 18885 Mega Spot Stencil 
and Snow White Colour Blast paste. Once dry tear into pieces.   


Stamp the 28246 Text Background Stamp onto white cardstock. 
Tear into two pieces.


Using the 19109 Crosses Stencil, stencil onto coloured i
mages using black gesso. 

Cut out sentiments from 19289 Big Black & White Sentiment Sheets. 
Before putting your cards together, draw around the edge of the white 
card front with a stabile pencil and wet the drawn lines with a paint brush. Put cards together adding some black cotton under the sentiments.


Thanks again for stopping by. Hopefully these cards have 
inspired you do make more use of your dies.
Until next time ... Cheers - Tanya xx


Thursday, 12 January 2023

Scandi Gel Print Card


Hello.....
Today I'm sharing a card I made using my Gel Press.
I may have had this gel press and brayer for a few years 
and not really used it... oops!! But 2023 is the year. I'm going 
to use it a lot more, I promise...


To make the prints I have added some paint to the gel press and 
rolled it out with brayer. I placed the stencil over paint 
and then placed paper over the top. I rubbed over the paper with 
my hands and then peeled off the paper to reveal pattern on the paper. 
I played around to get different images from the stencil.I have so much 
to learn and that's the reason 2023 I'm going to play with my 
Gel Press and Brayer more. 
When dry, which is nearly straight away, I diecut using 
the rectangles dies.

The Paper Rose Products that I used for this card was:


Thanks again for stopping by. Watch this space... you might just see some more gelli printing with stencils.
Cheers - Tanya x


Tuesday, 3 January 2023

Happy Birthday Lovely


Happy New Year!!!
2023... can you believe it. 

Well its time for me to share another of my 
Paper Rose Design Team projects. 


Cut out the circle grid twice onto white cardstock. 
It lines up and fits perfectly if you put the die into one of the 
rows of circles that you first cut to cut the extra circles.
Die cut out the mandala from white cardstock. 
Fussy cut out some flowers and die cut out some circles from 
the die using papers from the Sarah's Story collection.
Stamp your sentiment onto white cardstock and 
raise with foam tape.


Thanks for stopping by  - Tanya x

Thursday, 22 December 2022

Thanks So Much


Hello for the last time this year.
 Three more sleeps until Christmas, who is organised.??

I'd just like to wish everyone at Paper Rose  
and everyone who is part of the Paper Rose Community 
very Merry Christmas. Please stay safe and enjoy time 
with your family and friends.
For those of you who get some time off work, enjoy the break 
and hopefully you get time to do a little crafting.


To create this card I have used the 
25996 Rambling Rose Border Die. I cut it out of 
white cardstock and painted it roughly with Distress Oxide.
For my sentiment I have used the 25606 Hand Lettered Thanks Die 
I have attached them all to a piece of kraft cardstock the 
same size as the card front. I hand stitched around the edge 
before attaching to the card front.


Happy creating - Cheers Tanya xxx