Saturday 24 July 2021

Adore - my gorgeous kids


Hello everyone 

Today I'm sharing another scrapbooking layout using Paper Rose 
Studio papers, dies, stencils and chipboard.

 
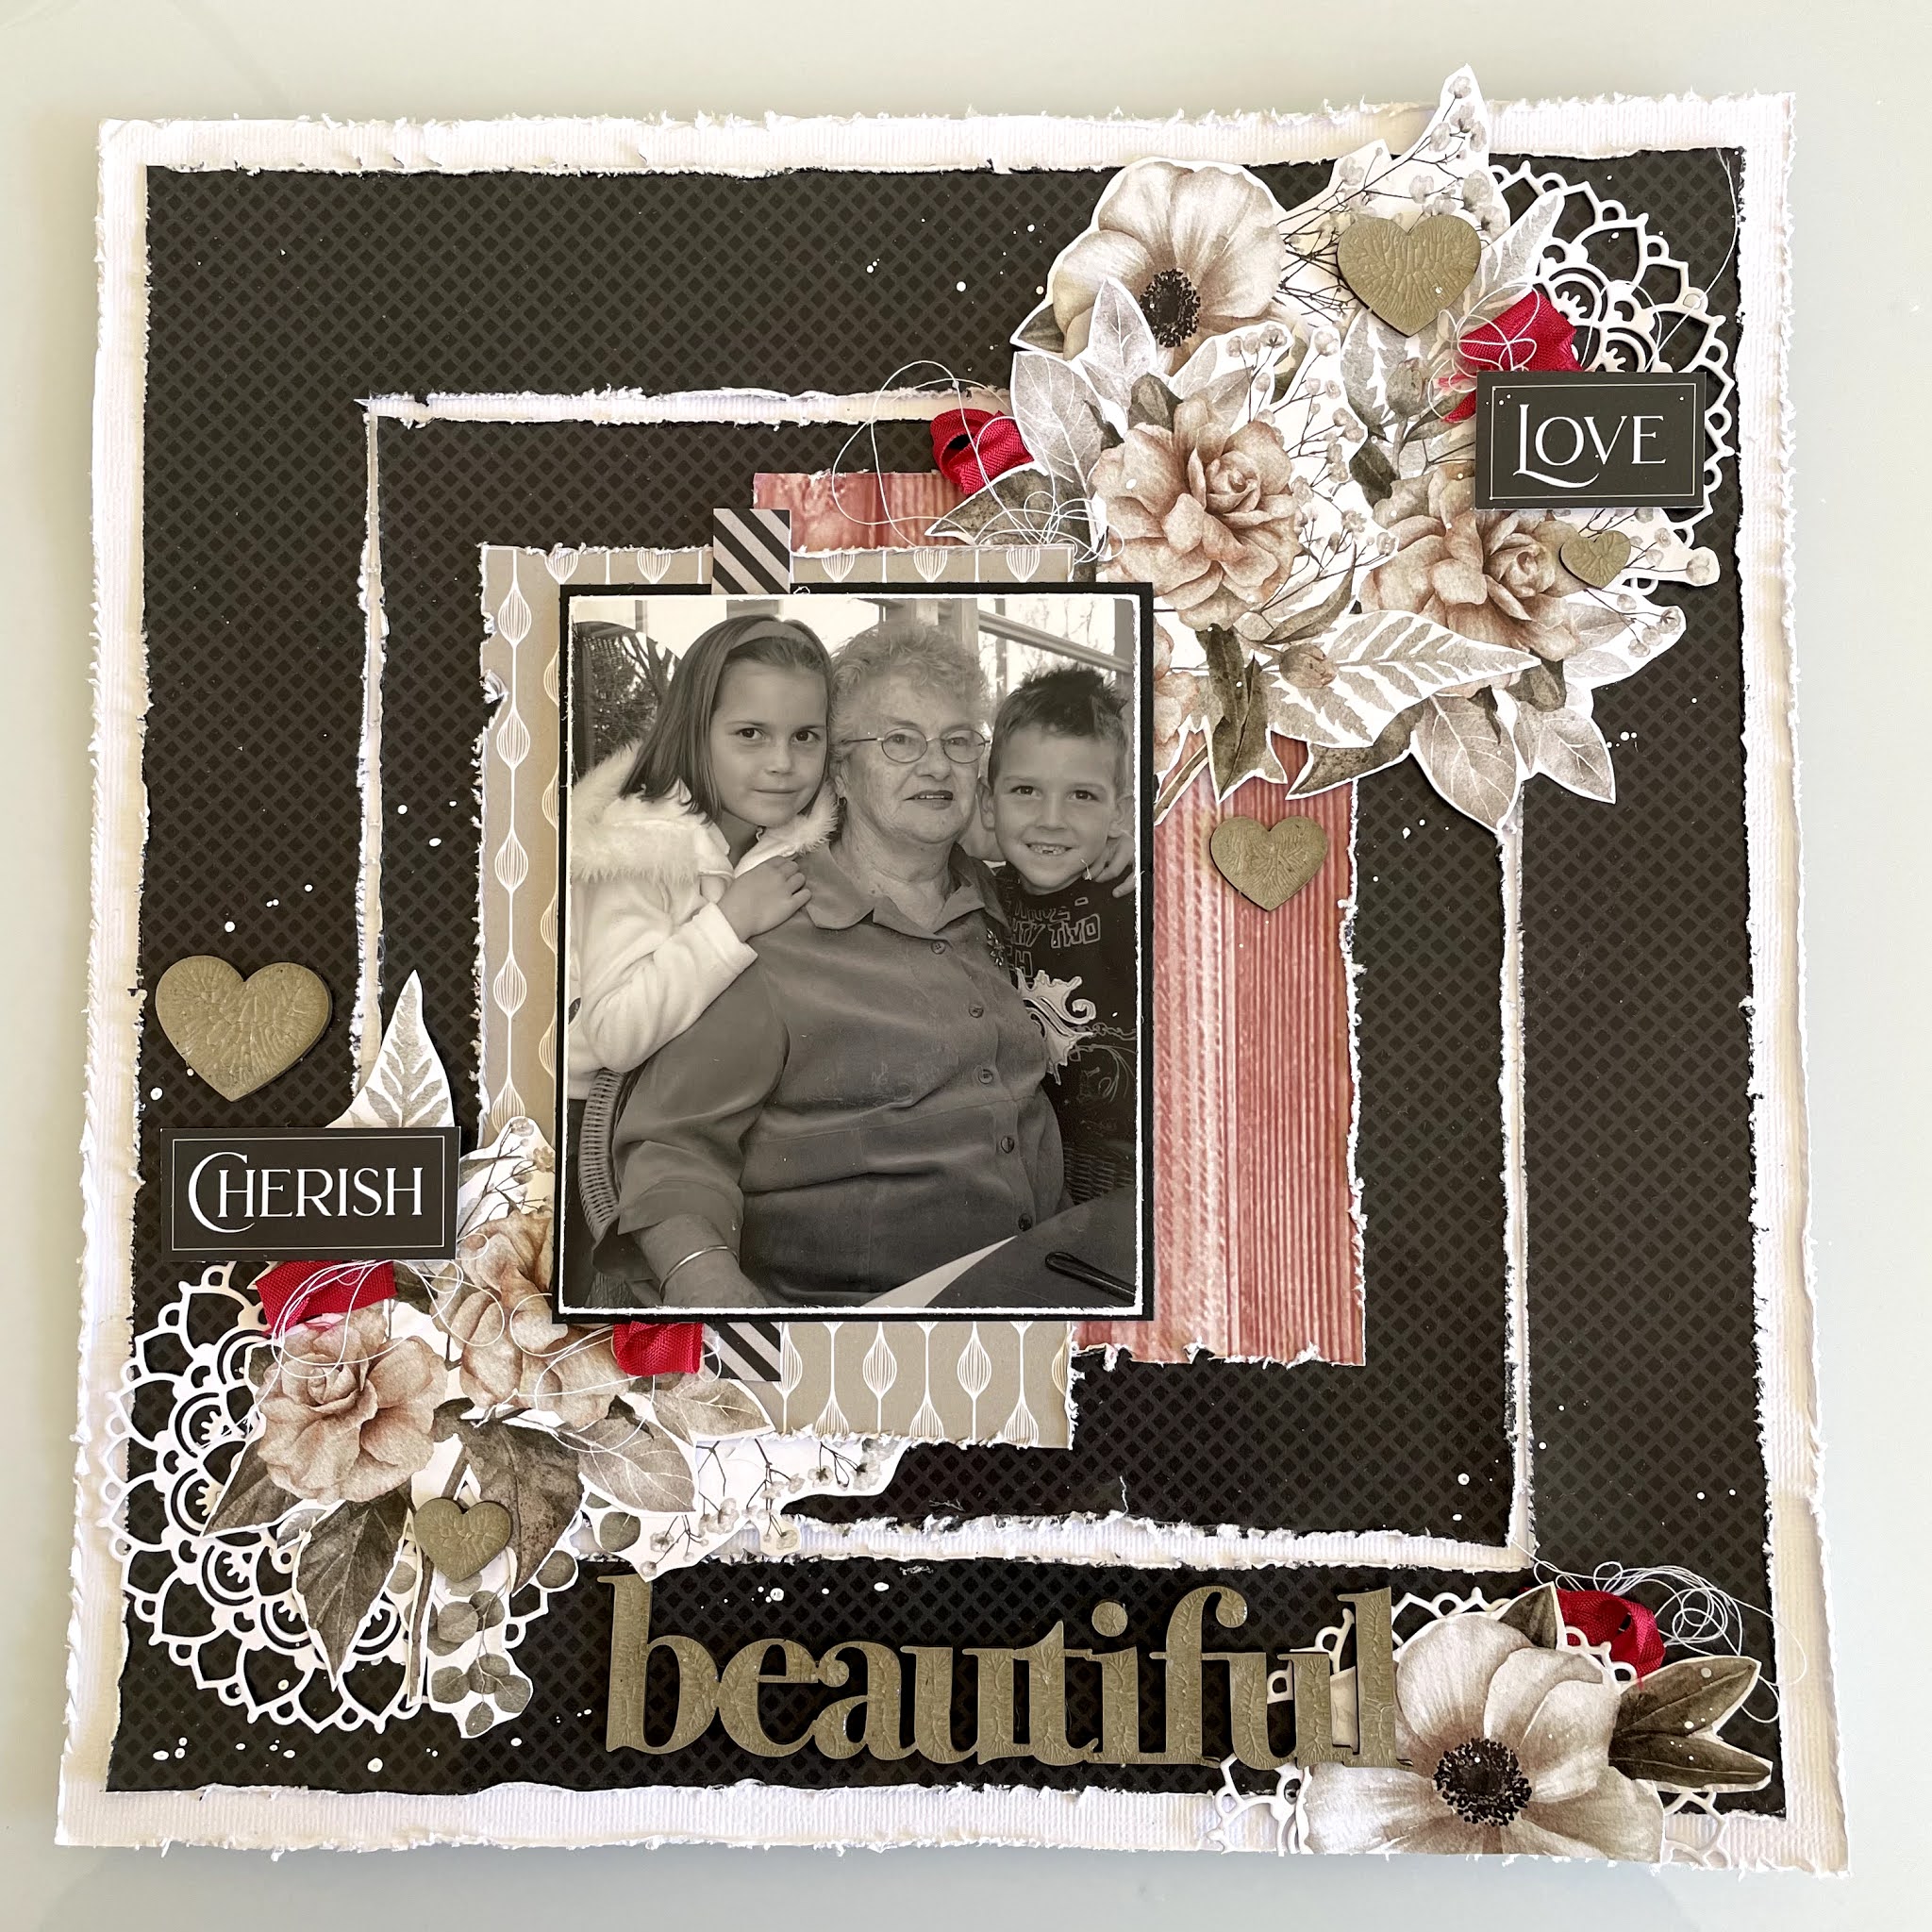
My goodness the papers in this 22300 Little Mandala paper collection 
are so so nice. They were a must have the minute I saw them.
Even though I got the 6x6 size they were still perfect for my 
layout. Each pack has 3 of each design and there are 12 designs. 
I used two of one of the designs as my main background piece, 
I just simply joined them up behind my photo.
I used another design to matt my photo and one to layer 
behind the matted photo.


Before I attached the papers to my layout I stencilled onto 
the white cardstock using Mont Marte Light Moulding Paste through 
The Mandala die that I have used was the 21342 Mandala Circle Die
It cuts 4 different pieces. I have separated them on my layout. 
The chipboard title is from the 21924 Block Girl Titles Chipboard 
SetThis set of chipboard comes with 6 different words. 
Gorgeous, Stunning, Darling, Lovely, Adore and Beautiful.
 They are a great size, would be suitable for either scrapbooking layouts or cards. I have colour the chipboard with Distress 
Paint - Faded Jeans. I have used Distress Oxide - Faded Jeans for the splatters 
on the layout too.
To finish off the layout I have added some flowers from my 
never ending stash of flowers, some cotton thread and I have 
machine stitched around the edge of the layout.

Once again, thank you for stopping by. 
Take care and happy creating xx

Monday 12 July 2021

Industrial Cards


Hello...

Time to share another DT post for Paper Rose Studio.
I've used some papers from the Industrial A5 paper collection.
The papers are perfect for male cards. One of the cards I have 
made is a shaker card, the other card I have made using some of 
the left over paper bits from the dies cuts on the shaker card.


To make the shaker card I have die cut out five pieces using the  
21441 Paper Piece Rectangle die. Four are from black cardstock 
and the top piece is from the 19181 Industrial A5 Paper Collection.
I have glued the black frame pieces together then I added a piece of 
clear acetate to the top of the black frame pieces. 

The top piece is patterned paper from the industrial paper 
collection. I have taped some of the die cut out pieces back into 
their spaces in the frame. Turning the frame upside down I added 
some gems from the 18942 Gem Flakes Shaker Mix and added a piece 
of black cardstock over the top to hold them all in place. 

To finish the front of the card off I fussy cut a few pieces 
from one of the papers in the paper collection. I have die cut 
some cogs out of silver cardstock using the 17868 Cog Frame Die.
The sentiment is done using 19023 Black & White Sentiments and 

When putting the card together I have die cut out the silver 
cardstock using 16575 Stitched Frames die. Layer a bigger piece of black cardstock then attach to the white card base.


For this card I have used all the same things as in the above card. 
I have die cut out some cogs from blue cardstock to add some 
colour to the card. 
The sentiment is die cut from the 


Saturday 3 July 2021

Beautiful Forever Layout

 Good Morning

Look how lovely this paper collection is from Paper Rose Studio.
It is perfectly suited for wedding cards and layouts but 
I really wanted to use it with this photo of my mum and kids 
when they were little. This is my favourite photo of my mum that 
I will cherish forever. Photos like this are so precious when 
my mum is now longer with us. 


To create this layout I cut the black paper 28.5cm x 28.5cm to allow the white cardstock to border the layout. 
Then come in 4cm each side to cut out the centre square.
I have cut down the centre square slightly to show leave a 
small gap between the big square and the small square. 
All the edges have been distressed.
I cut two different papers to measure 11cm x 16cm. They are 
also distressed and layered under my photo which has been matted 
with black cardstock and raised with foam tape. The thin strip of grey and black paper under the photo is part of the barcode.


A little bit of fussy cutting of flowers and sentiments were
 done and added to my layout. I die cut out three mandala 
flowers from white cardstock and added them to the layout 
before adding the fussy cut flowers.

Once the chipboard was added too the layout I applied 
Crackle Accents to the title and the hearts to give a crackled 
effect.
Lastly I added some scrunched up ribbon, white thread and splattered using Dina Wakley White Gloss Spray. 


Below are the Paper Rose products I used to create this layout.
Click on these links to be taken to the Paper Rose Studio website

Thanks for stopping by....have a wonderful day
Tanya xx